Website annotation

Comment directly on any live website

Paste a URL and ClientTweak opens the site with a comment layer on top. Click the heading, button or image you mean and leave a note that stays attached to it.

  • Live and staging URLs
  • Nothing to install
  • Pins anchor to elements
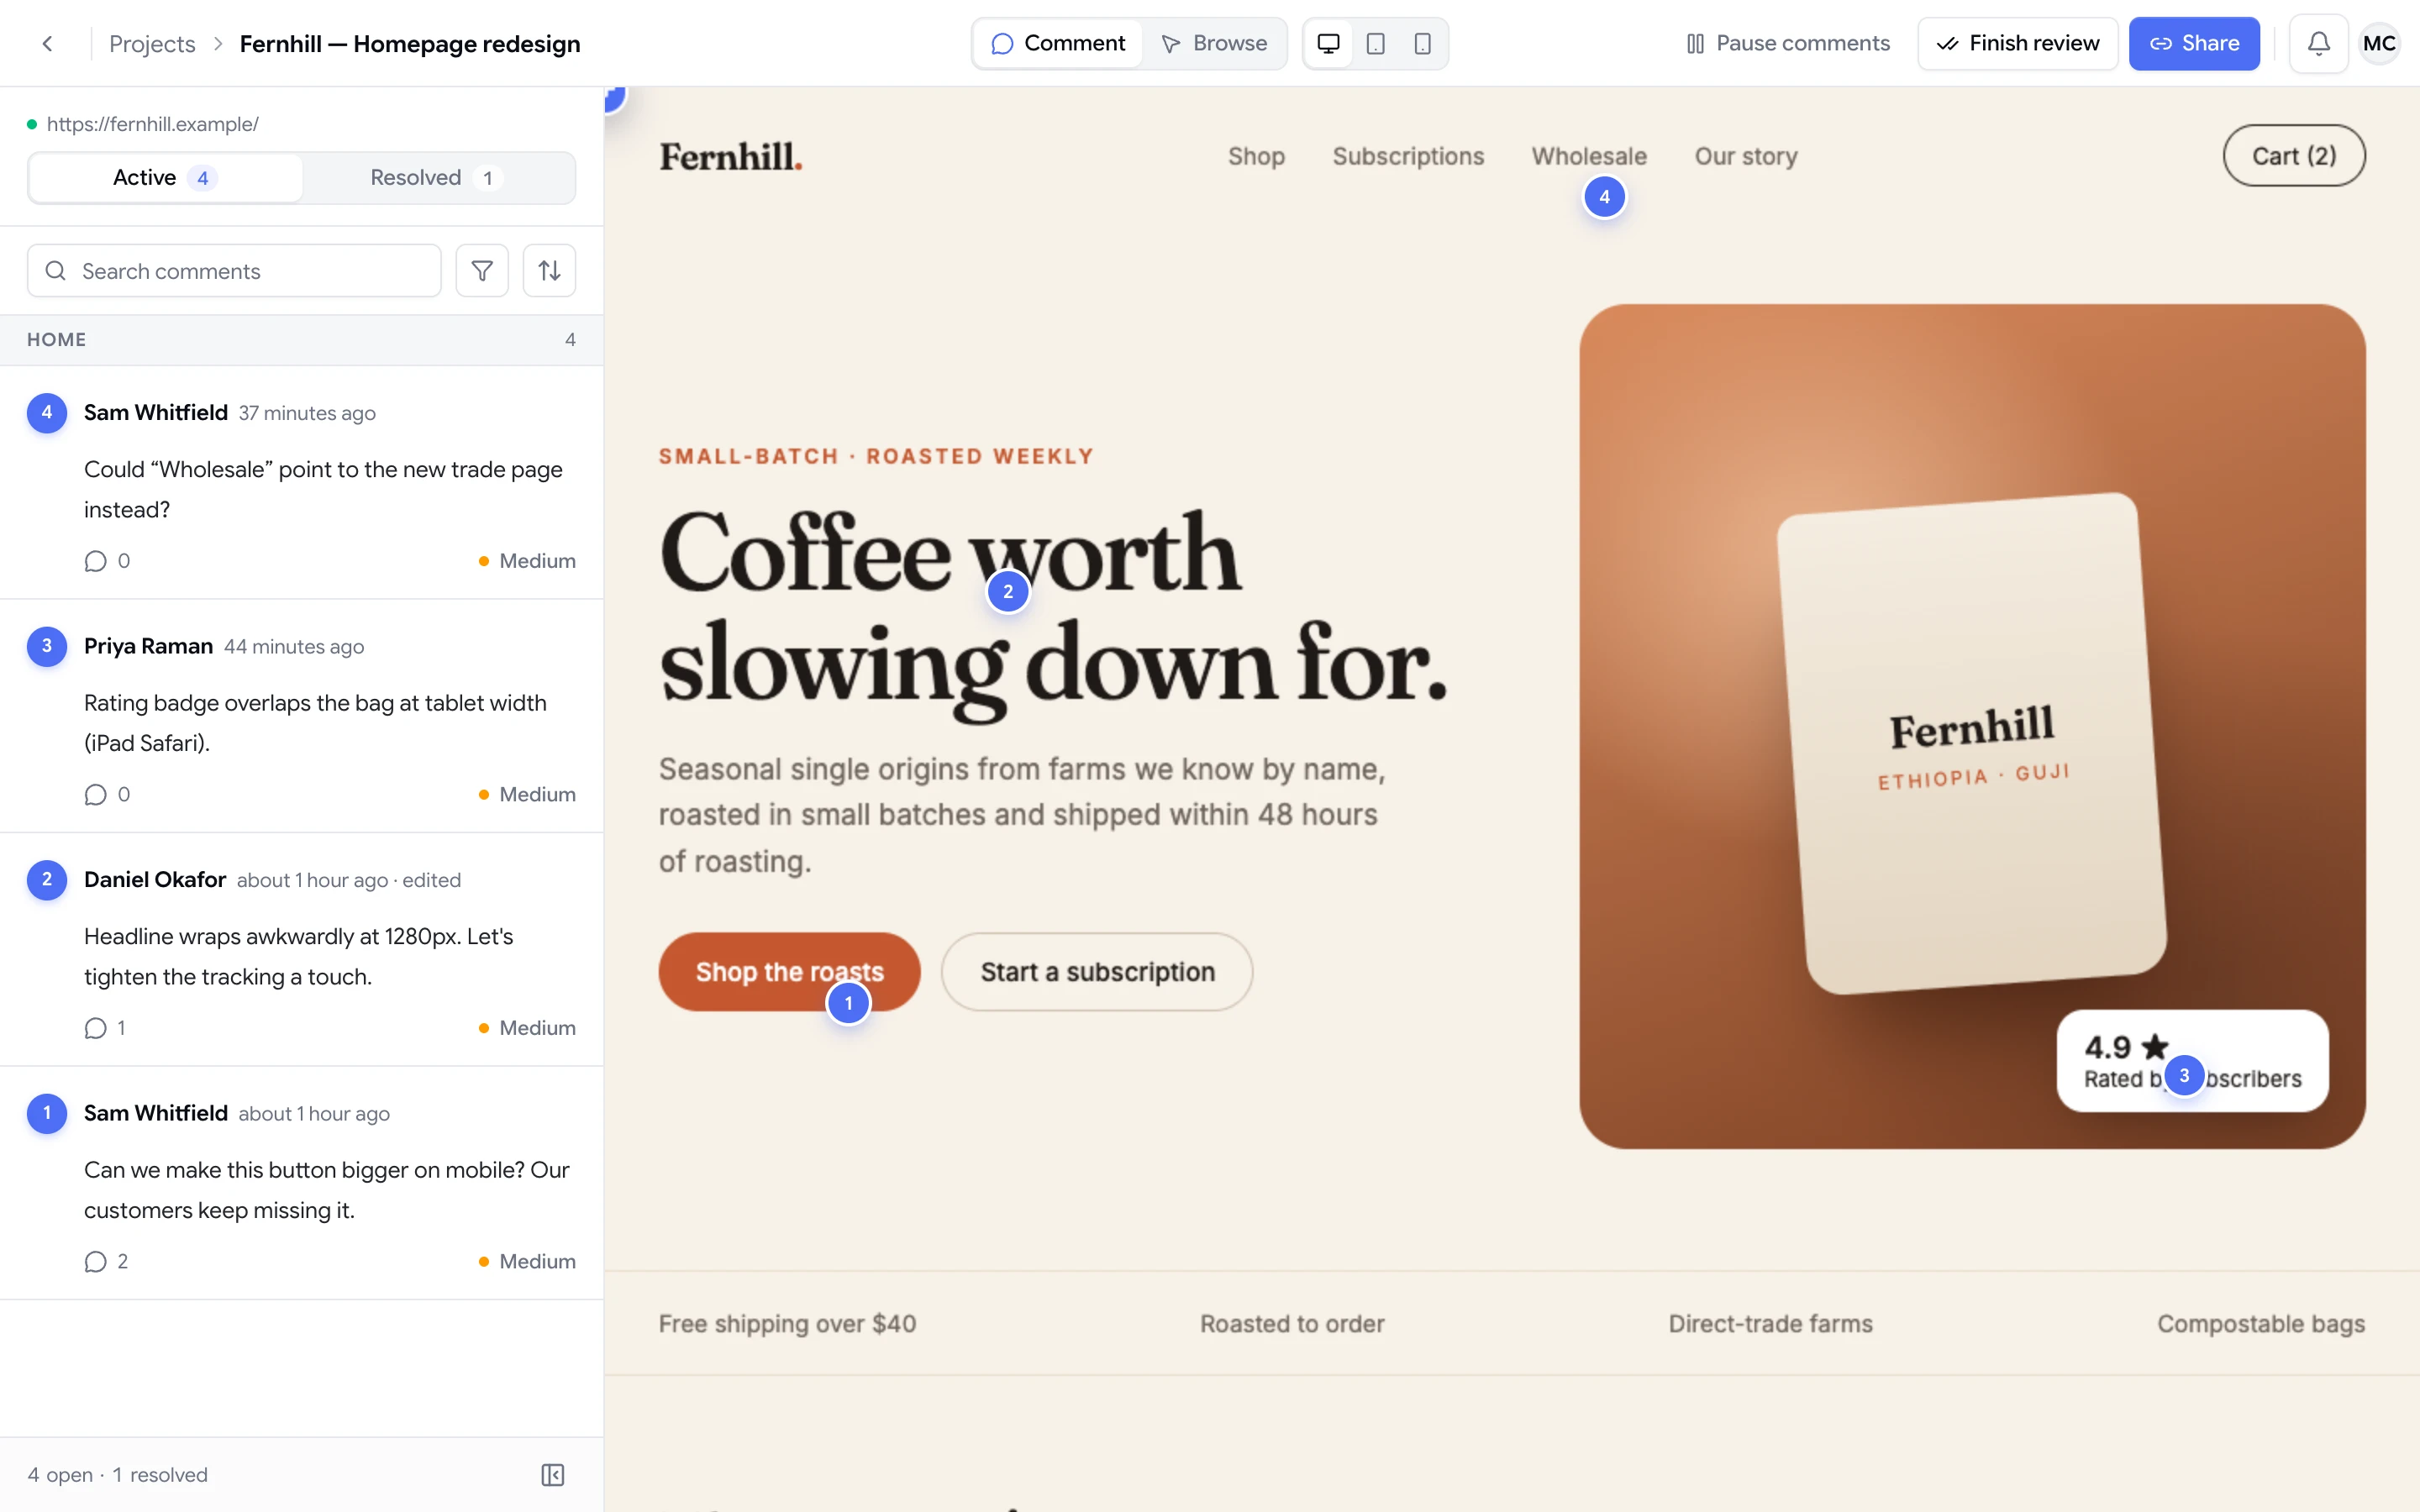
ClientTweak review screen: a client's homepage with numbered comment pins and the comment list beside it
The problem

Website feedback breaks down the moment it leaves the page

  • “The button near the top” could mean four different buttons.
  • Screenshots get cropped, annotated in three different apps and lost in email.
  • Feedback for the pricing page shows up in a thread about the homepage.
  • Nobody can tell which comments have already been fixed.
Highlights

Everything you need to mark up a website

ClientTweak puts the comment layer on the real, working site — not a static picture of it.

Any public URL

Review a production site, a staging build or a preview deployment. If it has a public URL, you can comment on it.

Click to pin

In Comment mode, click any element and a numbered pin appears exactly where you clicked.

Anchored to the element

Pins attach to the element itself, not a fixed screen coordinate, so they stay with the thing they describe.

Browse mode

Switch to Browse to click links, open menus and move between pages like a normal visitor.

Draw on the page

Use Annotate to sketch on top of the page when an arrow or a circle says it faster than words.

Attach files

Add reference images, documents or a Loom recording to any comment so the fix has everything it needs.

Review the real site, not a screenshot of it

Most website feedback starts with someone taking a screenshot, drawing on it and pasting it somewhere. By the time it reaches the person doing the work, it has lost the page it came from, the size of the screen and half of its meaning.

ClientTweak skips that step. Add a project with the site's URL and it loads inside ClientTweak through a proxy, with the comment layer on top. Your reviewers see the live page with its real fonts, images and layout, and they comment on it directly. Nothing gets installed on the website itself, and reviewers don't need a browser extension.

  • Works with live sites, staging builds and preview URLs
  • No script, plugin or extension to install
  • Every comment is tied to the page it was left on
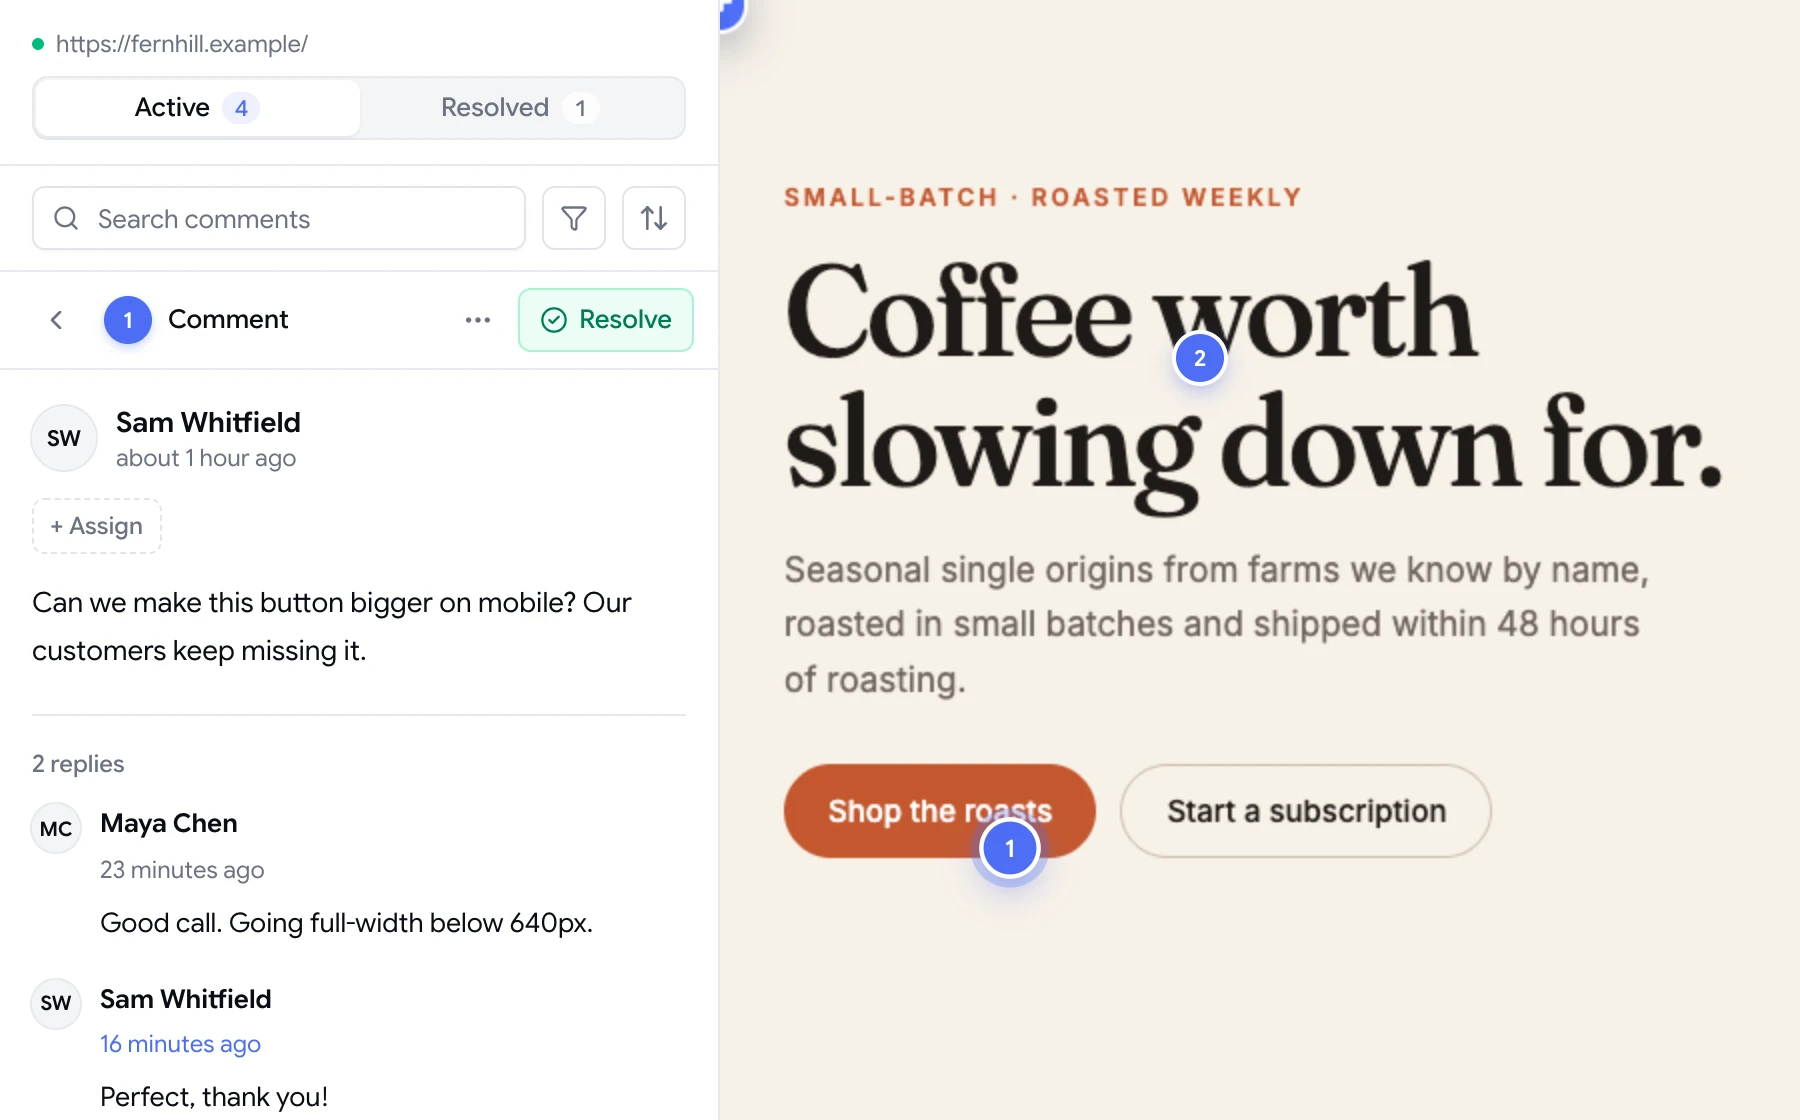
A comment thread with replies, pinned to a button on the page

Browse mode and Comment mode

Reviewing a website isn't the same as reviewing a PDF. People need to open menus, follow links and get to the page they care about before they can say anything useful. That's what Browse mode is for: the site behaves the way it would for any visitor.

When something needs a comment, switch to Comment mode and click. A numbered pin drops on the element and a comment box opens next to it. Switch back to Browse to carry on through the site. Comments are grouped by page, so feedback on the pricing page stays with the pricing page.

  • Navigate the site normally in Browse mode
  • Click once in Comment mode to pin feedback
  • Comments are grouped by the page they belong to
  • Numbered pins match the numbered comment list

Pins that stay attached to what they describe

A pin in ClientTweak isn't a dot floating at a fixed position on the screen. When you click, ClientTweak records the element you clicked and where on it you clicked. When the page is opened again, the pin is placed back on that element.

That matters on real websites, where content shifts as images load, text changes and sections are added. Feedback about the signup button stays on the signup button.

  • Pins record the element as well as the click position
  • Drawings and attachments travel with the comment
  • Open a comment to jump straight back to its pin
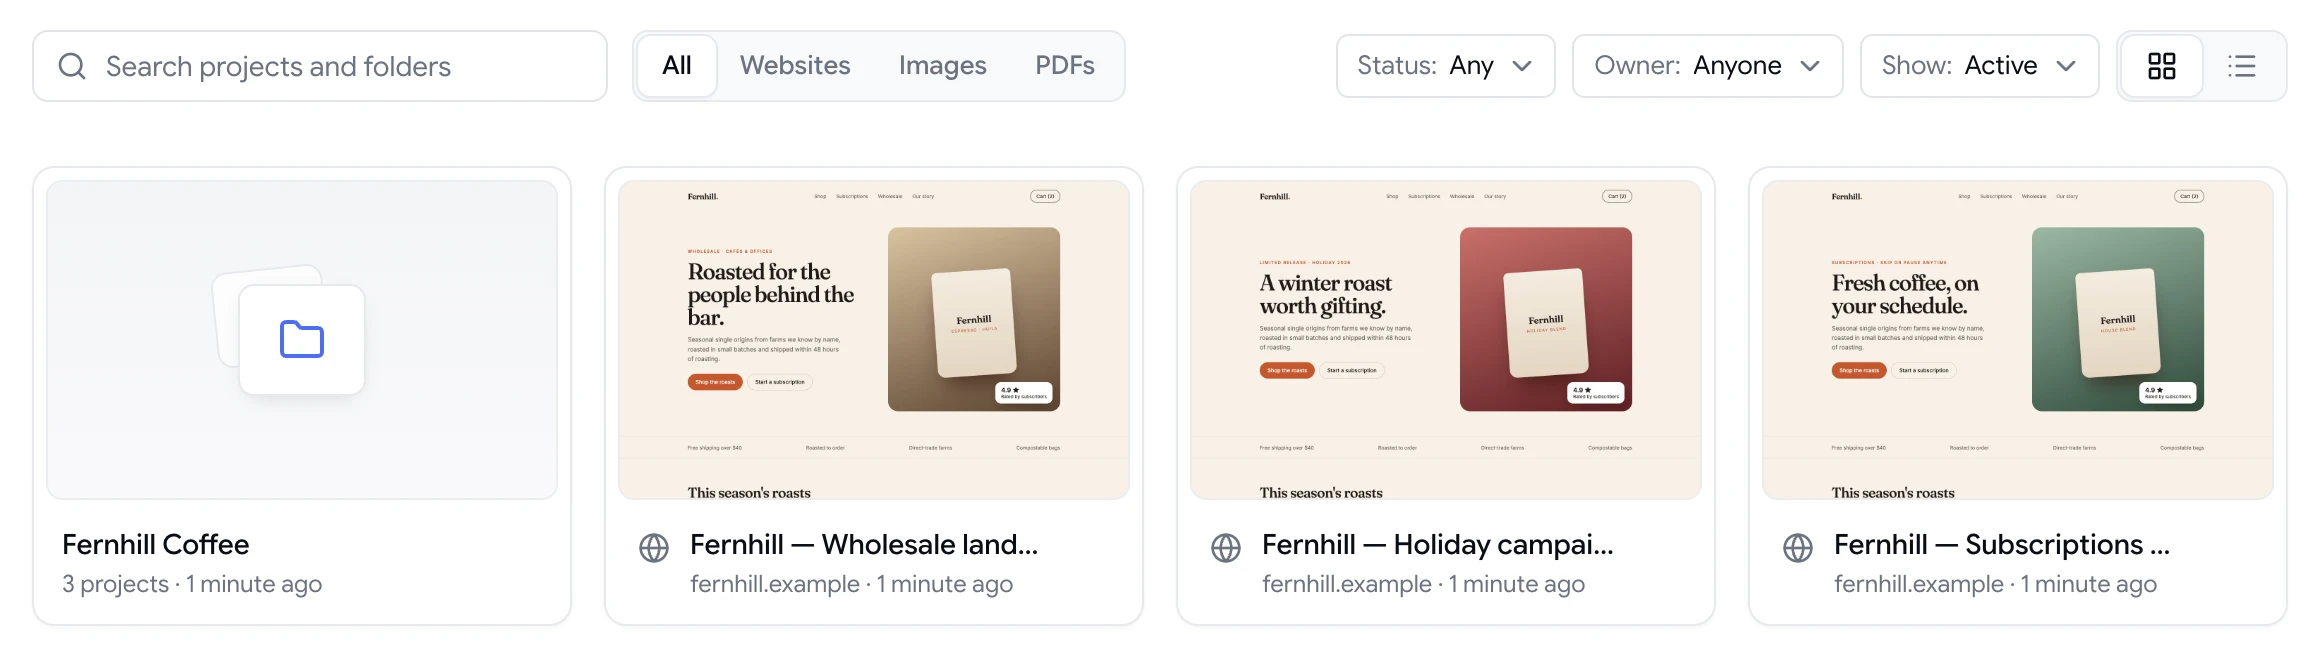
ClientTweak dashboard with a client folder and website project previews
How it works

From URL to pinned comments

  1. 1

    Create a project

    Paste the website URL and give the project a name.

  2. 2

    Browse to the page

    Use Browse mode to get to the page you want to review.

  3. 3

    Switch to Comment

    Click the element you mean and type your comment.

  4. 4

    Share the review

    Send a guest link so clients and teammates can add theirs.

FAQ

Frequently asked questions

How do I leave comments directly on a website?

Add the site's URL as a project in ClientTweak, switch to Comment mode and click the element you want to talk about. A numbered pin appears and you can type your comment right there.

Do I need to install anything on my website?

No. ClientTweak loads the site through a proxy and adds the comment layer on top. There's no script, plugin or code snippet to add to your website.

Can I review a staging or development site?

Yes, as long as it's reachable at a public URL. Staging builds and preview deployments work the same way as a live site. Pages that sit behind a login form aren't supported.

Can reviewers click links and navigate the site?

Yes. Browse mode lets reviewers use the site normally — open menus, follow links and move between pages — before switching to Comment mode to leave feedback.

Can I draw on the page or attach files?

Yes. Use Annotate to draw on top of the page alongside a comment, and attach files or reference images to any comment. With the Loom integration you can embed screen recordings too.

What happens to pins when the page layout changes?

Pins are anchored to the element you clicked rather than a fixed screen position, so they're placed back on that element when the page is opened again.

Get started

Put comments where the work is.

Paste a URL, click an element and start a review that everyone can follow.

  • Unlimited guest reviewers
  • Nothing to install
  • One flat price